Good morning! I'm not sure anyone is even following me here anymore, but, just in case, I wanted to pop in and let you know that things here at P&P are moving over to my personal blog, WorkmanFireFamily. I will still be posting my DIY projects, furniture rehabs and rescues, and of course, the total flops. Having two blogs to keep up with, along with a full-time day job and being mom & wife well, it just was all too much. Keeping it real, and all in one place, will hopefully free up some time for me to do the things that make me happy, and keep me sane. Or some semblance thereof.
So, please head over and check out my latest projects at the Workman Fire Family. Thanks for stopping by!
Thursday, September 18, 2014
Saturday, November 2, 2013
Bits & Bobs from Here and There
Howdy! I know, it's been a while. But I've not been idle! Here are a few shots of what I've been up to:
I tore apart my close-to-15-years-old fall wreath and updated with some junk I had lying around:


I tore apart my close-to-15-years-old fall wreath and updated with some junk I had lying around:
We got Drama a bunk bed and I was banished from the room whilst the manly men in my life assembled it.
Decorating the yard was taken over by no less than 7 little boys from around the 'hood. They had a blast!
And a trip to the lake for my Dad's birthday at the end of September.
I've had a few more things cooking, like working with Frog Tape Shape Tape for the first time, using my E6000 glue on a glass project, and trying to keep my pretty fall decor from being ruined by said manly men.
What have you been up to?
Monday, October 7, 2013
I'm okay!
I've not posted much lately. Even for me! But I've not been idle friends. Oh no. I finished up the towel bar for the boys bathroom. Its ginormous. It has 6 wood hooks, which I ripped from a 1x1, stained to match, and color coded for each kid.
The towel hanging success rate is up to about 65% now, which is awesome. The clothes on the floor rate hasn't budged, so I'm considering a laundry strike.
And in case you're curious, those vinyl decals are holding up well. Steamy showers and midnight fights with gobs of wet TP (don't ask) have yet to leave a mark. Awesomeness.
Monday, September 23, 2013
Project Elephant, Part 3 & 3.5

I'm so productive! More things checked off the list: Finish up my poor little abused tray - CHECK. Spray paint frames & shelves glossy navy blue - CHECK.
Here's my little tray. Just imagine it all sad, with cheap mahogany veneer over cheap pine and pockmarked with holes.

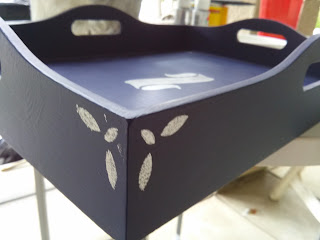

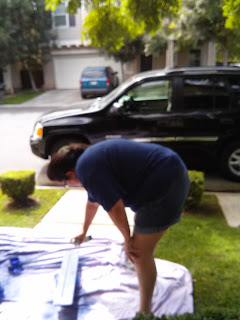
I do need to go back and touch up the stencils. It started raining as I was working on Saturday, and I had to scramble to get my shelves off the lawn! I may even decide to add a great big monogram to the middle. I need to let that thought marinate a while first though.
As for the huge gallery wall, we went from this... To this:
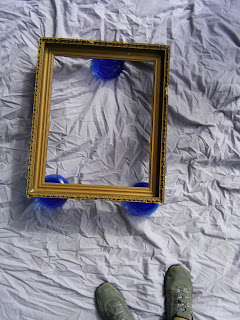 |
| My chippy broken $5 estate sale frame. |
 |
| I'm not showing it all yet. It's blue and gilded and GORG! |
And here is a non-glamorous painting shot - it's the only one I have of the shelves (3. 2 ledges & 1 shelf) Many not-thanks to my sneaky Aidan for shooting this one!
And that's all we have time for today folks! I'm going to be linking up at:

Project Elephant, Part 2
I'm making progress! Maybe what I needed was some long-distance internet encouragement? No matter. I'm making progress, and that's what counts.
The other day I showed you some teasers for this next project. Well, here it is in all it's glory...
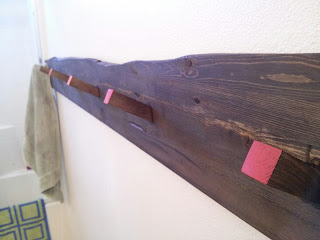
Yes my friends, that is a 6-foot long towel bar! There are 6 hooks, which makes my fondest wish that each of the boys will HANG their towel and their robe up. I know I know! It's a total long-shot. BUT, they are invested in this project as well, so I'm hoping the ownership factor will help.
I had them distress the back, which ended up splitting the 2x6 down the length. I went with it, and crafted a faux-live-edge (top). I also let them each choose a color for the end of the pegs. Aidan has red, Logan orange and Gavin is blue. I happened to have some sample pots lying around from yet another project that went belly-up before I really got started.
I spent less than $20 on this. We had the back piece, which was only a couple of bucks anyway. I paid about $2 for the 1x1 I used for the pegs (and I only used half). The cleat was the big ticket, coming in at around $13. And I really don't even like the way it's hanging, so I may convert to a series of D-rings across the back. The cleat just seems to pop it out from the wall too far. I'm not sold, but I'm not revising yet either.
Here are few more (bad) photos for your viewing pleasure.
 |
| All stained up & ready for paint! |
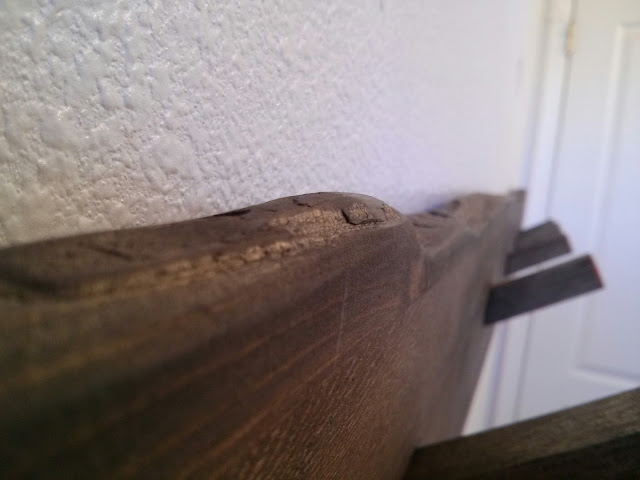 |
| How do ya like that edge? |
 |
| Blue & orange |
 |
| Why yes, I did stand in the shower for this! (please ignore the crud on the floor, behind the door, it's there no more!) |
 |
| Gavin was "helping" by "washing" the mirror, and keeping track of my tools. Just keeping things real people! |
Sharing at:
Saturday, September 21, 2013
Project Elephant, Part 1
I actually finished this mini-project up last week. For my first bite, I figured I'd better start small!
This is where my cute little yard-sale pewter tray ended up:

Can you see it? Right, THERE. Filled with chamois, staples and partially hidden by rags. Yeah, I'm all over that.
A quick clean, and a shot of slate blue spray paint later, and here is where she's at:

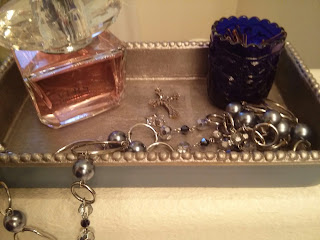
So, that's my first teensy bite of Project Elephant. Not bad 'eh? I think she's cute, and she's helping me corral all of my little sparklies, instead of them being strewn all across the vanity.
Here's a sneak peek at the next project on the list:

 What projects are you tackling this weekend?
This is where my cute little yard-sale pewter tray ended up:
Can you see it? Right, THERE. Filled with chamois, staples and partially hidden by rags. Yeah, I'm all over that.
A quick clean, and a shot of slate blue spray paint later, and here is where she's at:
 |
| Look at that paint line! Love me some FrogTape! |
 |
| Guess I got excited and bobbled the camera... |
So, that's my first teensy bite of Project Elephant. Not bad 'eh? I think she's cute, and she's helping me corral all of my little sparklies, instead of them being strewn all across the vanity.
Here's a sneak peek at the next project on the list:
What projects are you tackling this weekend?
Tuesday, September 3, 2013
Tackling the elephant in the room
So, Abbie over at Five days…5 ways, has an awesome new challenge for us. It’s called ‘Project Elephant’, and it’s all about eating the elephant of To-Do lists we all have. One. Bite. At. A. Time.
I’m totally joining in. I need this! I’ve got so many things lying around half finished, or just percolating in my brain because I’m so overwhelmed by it all that I can’t bear to take care of any of it! It’s time to take control of the list, and CHOMP.
Check out Abbie’s blog, and decide if Move-It-Monday Project Elephant is for you. Or just hang around and encourage us…because I can tell you, I’ll need every bit I can get!
UPDATE: Here is my list of projects for Project Elephant, and my progress thus far:
2. Tackle the HUGE (we're talking 6'x20') statement wall in the great room (I'll be happy if I just START this project!) this includes a mini-list: a)take everything off the wall & clean it,
3. Frame & hang adorable inspirational art I've had in a folder for too long
Subscribe to:
Posts (Atom)